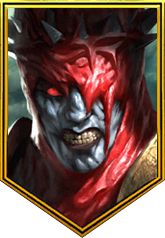
Lunar Caller
Lunar Caller Champion Loadout


The aim of this build is to help keep the rest of your champions alive during the Amius the Lunar Archon fight. If you do not have someone to bait his A3, you can also use Urost for that in a pinch although flipping Strengthen turns into Weaken so it's not the most preferable ability to do it with but it works. The A3 can be helpful throughout the rest of the fight.
Urost naturally has a really high health pool, can be built super tanky and has a few abilities that lend well to this fight, like his A1 Shield and his really nice passive ability which grants him additional health as well as places poisons. Poisons and Brimstone can dish out decent damage in this fight if you want to build Urost for some accuracy. He makes a decent champion to build that way.
Strategy Description
Artifacts Description
Your set doesn't matter as much for this fight but for this champion I did feel like you could help the rest of your team with your artifact choice. For Urost I chose the Guardian set to help aid some of his allies in the damage mitigation process. This way super tanky Urost can help keep not-so-tanky other champions alive longer in the fight. I like the little bit of regeneration it offers as well. Especially if you plan to use his A3 during this fight to put out the Ally Protection.
In an ideal world, I would go with the five piece Protection set with the extra two pieces available in the armor and the three accessory pieces combined for the five piece combo. You get extra +15% health, +24% speed, +20 resist and a 25% chance to make the buffs from his A3 protected. We all know that is very hard to come by but in a perfect world, go with that.
Immortal is a great two piece set to go with here for some extra regeneration but you can go with most anything you want to supplement here. Perception is good for more accuracy. Speed sets work. It's mostly a stat thing. Try to get his HP as high as possible and if you have some blessing levels, you can build up his defense more. If you want to land poison and/or Brimstone, make sure to build some accuracy. Otherwise build him with some resistance if possible.
* Some artifact sets have upgraded versions available. If you have a better upgraded version of this recommended artifact set, definitely use that instead.


Avoid Cycle of Magic. That's the main message here. Build up the defense and support trees. I didn't need as much accuracy for my own build so I chose to go with some extra health from the support tree. I grabbed the extra +5% shield from both trees as well as the extra 5% healing. Shadow Heal is a favorite of mine for this fight.
Delay Death is always good. Solidarity for a little extra resistance really doesn't hurt. Retribution gets you to Unshakeable if you want it. Sniper can help land the poisons and Master Hexer can extend them by one turn. Eagle Eye is what I went for my sixth tier mastery. Unshakeable is a good one, too, if you have enough accuracy already.


. The value of the [Shield] is equal to 15% of this Champion's MAX HP. Occurs once per turn")


. Cooldown: 1 turn")


Brimstone
Brimstone
Level 1 Blessing
Brimstone works great for this fight as usual. If you're building Urost for landing poisons, he may make a good candidate for the Brimstone here. Low level Brimstone works if it is all you have. The higher the blessing level the better, for many reasons.
Level 6 Blessing
With the higher the awakening level, the more damage mitigation you get so that is a great thing about high level blessings. Also an easier chance to land the Brimstone effect.