Killer Kong
Killer Kong Champion Loadout
Samson naturally fits very well within the arena with his arena back story within the game. I tried to build him with that in mind. He has the ability to Stun on his A1 and Increase his own Accuracy as well as the teams. I wanted to build him with some accuracy but I didn't want to go all out. I wanted to use him against the go-1st speed type meta teams like Arbiter teams. Naturally he is going to get hit and attack based nukers just don't generally have a lot of resistance so we should be alright with lower accuracy.
I did want to build him with a LOT of HP and critical damage. Since he has a conditional A2 attack based on if he kills someone, we most definitely want that second hit to go off! So we're going to need to do as much damage as possible to champions with as low health and as little defense as possible. That's the goal in mind here.
We will rely on his counterattacking prowess to set the tone of the fight after he absorbs a blow. This way he can do some damage to an enemy, softening them up, before going in with the A2 kill shot. This will him to CC his foes as well before bringing them to their ultimate untimely demise.
Strategy Description
Artifacts Description
I tried a few different sets on Samson, like Swift Parry or Bolster for example and the results were a bit underwhelming to be quite honest. I decided the best set for him out of what I tried was Savage/Lethal or maybe if your Samson is too slow and you got the battle pass, the Instinct set. We could have went with Perception but I chose Critical Damage as his 2-piece or in my case Killstroke for a little extra speed. More damage > more accuracy to some degree here so I kept that in mind.
I wanted to hit some stat thresholds. Like 200 accuracy or more. 80k-100k health. 2,000-3,000 defense. 100% critical rating and as much critical damage as possible. We want our Samson to smack hard and smack hard again but we also wanted him to land his stuns so we also were wise to pick vulnerable prey.
* Some artifact sets have upgraded versions available. If you have a better upgraded version of this recommended artifact set, definitely use that instead.
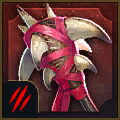
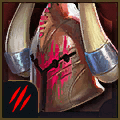
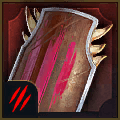
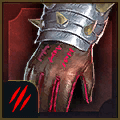
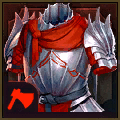

* There is an upgraded version of the Savage set called Lethal that can be crafted from materials gained from the Doom Tower when fighting the Dark Fae boss.
Samson has some of the most unique style masteries in the game honestly after breaking him down. There is so much going on that you normally wouldn't use that seems viable here and some of his kit is actually supplemented or just built in defense masteries. The support tree can offer a lot of utility and extra health or accuracy depending on how you decide to go.
I went with the Offense tree here to get down to Helmsmasher. There was several masteries I liked for Samson I don't normally use and some I normally use that I wouldn't here.
Starting with the first row, when you build a go-1st nuker, you might want to use Heart of Glory for more damage when full health. We're getting nuked here so without a heal after the nuke, we won't have full health. Unless we got rocked and it's looking bad, we also won't need Grim Resolve. You will want to build him surrounded by some champions to help him survive. Pythion for example is a nice teammate. I found myself nuking enemies with shields more than I nuked them with full health so I felt that was a high percentage pick.
Going Shield Breaker also allowed me to go after Ruthless Ambush for extra damage on the first hit and Opportunist to help get some extra damage on anybody stunned by an initial counterattack. Single Out also gave me an additional 8% to anyone on the second hit that survived the first hit with 40% or less health left.
Normally you might go Bring It Down but in this case, Samson is the one with higher health. Especially if you counter-pick him against attack based teams. So now you have the option of Wrath of the Slain or Cycle of Violence. I chose Wraith of the Slain since I could guarantee a dead ally before his first attacks but if you can't do that, then pick something else. Anything else.
Methodical and Killstreak just made a lot of sense. You get extra damage on your A1 counterattacks, then you get some extra damage after you kill someone, however that happens. The Defense tree just seemed to double-down on a lot of what Samson already does. He already counterattacks so you don't need Retribution of Deterrence. I'd rather grab Cycle of Revenge. There is a nice synergy between his passive and Improved Parry though.
For the complimentary tree, I chose the Support tree for the extra accuracy. I wanted the Stun to land and to get the extra 12% damage on my A2 attacks. If you wanted to, you could go extra health from Steadfast to squeeze out a tiny bit more damage. It's up to you how you want to balance out your accuracy statistics.
You could go down to Lasting Gifts for more turns on the buffs and grab Cycle of Magic. I had Sun Wukong in mind to take advantage of Spirit Haste. I think he makes a great partner to Samson in this regard.
Like I said before, just one of the more interesting kits with mastery pairings I've seen in this game. A fun one to analyze and build.


![Shield Breaker: Increases damage inflicted to targets under [Shield] buffs by 25% Shield Breaker mastery icon.](/images/raid-shadow-legends/masteries/shield-breaker.png)


![Opportunist: Increases damage inflicted to targets with [Stun], [Sleep], [Fear], [True Fear], [Freeze], [Petrification] debuffs by 12%. Opportunist mastery icon.](/images/raid-shadow-legends/masteries/opportunist.png)


![Blood Shield: Places a [Shield] buff on this Champion for 1 turn when this Champion kills an enemy (except Boss' minions). The value of the [Shield] is equal to 15% of this Champion's MAX HP. Occurs once per turn Blood Shield mastery icon.](/images/raid-shadow-legends/masteries/blood-shield.png)


![Rejuvenation: Increases the amount of healing and the value of [Shield] buffs this Champion receives by 5% Rejuvenation mastery icon.](/images/raid-shadow-legends/masteries/rejuvenation.png)
![Mighty Endurance: Decreases the damage received by 10% if this Champion has [Stun], [Sleep], [Fear], [True Fear], [Freeze], [Petrification] debuffs. Mighty Endurance mastery icon.](/images/raid-shadow-legends/masteries/mighty-endurance.png)


![Wisdom of Battle: Has a 30% chance of placing a [Block Debuffs] buff on this Champion for 1 turn when [Stun], [Sleep], [Fear], [True Fear], [Freeze], [Petrification] debuffs expire on this Champion. Wisdom of Battle mastery icon.](/images/raid-shadow-legends/masteries/wisdom-of-battle.png)


![Harvest Despair: Has a 60% chance of placing a [Leech] debuff for 1 turn when placing [Stun], [Sleep], [Fear], [True Fear], [Freeze], [Petrification] debuffs. Harvest Despair mastery icon.](/images/raid-shadow-legends/masteries/harvest-despair.png)


![Deterrence: Has a 20% chance to counterattack an enemy when they apply a [Stun], [Sleep], [Fear], [True Fear], [Freeze], [Petrification], or [Sheep] debuff on an ally. Cooldown: 1 turn Deterrence mastery icon.](/images/raid-shadow-legends/masteries/deterrence.png)


![Fearsome Presence: Increases the chances of placing a [Stun], [Sleep], [Freeze], [Fear], [True Fear], [Provoke], or [Sheep] debuff from Skills or Artifacts by 5% Fearsome Presence mastery icon.](/images/raid-shadow-legends/masteries/fearsome-presence.png)


![Shieldbearer: Increases the value of [Shield] buffs this Champion casts by 5% Shieldbearer mastery icon.](/images/raid-shadow-legends/masteries/shieldbearer.png)


![Healing Savior: Increases the amount of healing and the value of [Shield] buffs placed by this Champion by 10% if the target ally has 40% HP or less Healing Savior mastery icon.](/images/raid-shadow-legends/masteries/healing-savior.png)


![Merciful Aid: Increases the amount of healing and the value of [Shield] buffs placed by this Champion by 15% if the target ally has [Stun], [Sleep], [Fear], [True Fear], or [Freeze], debuffs Merciful Aid mastery icon.](/images/raid-shadow-legends/masteries/merciful-aid.png)


![Lasting Gifts: Has a 30% chance to extend the duration of any buff cast by this Champion by 1 turn. It will not extend [Block Damage], [Unkillable], [Revive on Death], or [Taunt] buffs. Lasting Gifts mastery icon.](/images/raid-shadow-legends/masteries/lasting-gifts.png)

![Sniper: Increases the chances of placing any buff from Skills or Artifacts by 5%. It will not increase the chances of placing [Stun], [Sleep], [Freeze], [Fear], [True Fear], [Provoke], or [Petrification] debuffs. Sniper mastery icon.](/images/raid-shadow-legends/masteries/sniper.png)
![Master Hexer: Has a 30% chance to extend the duration of any buff cast by this Champion by 1 turn. It will not extend [Stun], [Sleep], [Freeze], [Provoke], [Fear], [True Fear], [Bomb], or [Petrification] debuffs. Master Hexer mastery icon.](/images/raid-shadow-legends/masteries/master-hexer.png)


Soul Reap

Crushing Rend
Level 1 Blessing
There are a few blessings here that make sense at the low level. If he counterattacks with cruelty he can shred some defense before his big A2 nuke. Soul Reap can also offer some utility in finishing off an opponent. An underrated one is Polymorph since he is built with some accuracy and his attackers should have low resistance.
Level 6 Blessing
At the higher end of the builds, I still like cruelty for softening up your opponents. I also like Crushing Rend for helping to annihilate them and bring them to their end. Both can help in the end goal of ultimate arena destruction.

