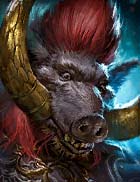
The Furious Ukko
The Furious Ukko Champion Loadout
I bounced a lot of bars in my day and I can say for sure, you don't want to piss off the bartender. If you do, the drinks will usually start flying. In this build The Mighty Ukko is furious and he wants the Hydra to acknowledge him. So I have Ukko in a Provoke set here to help against the Head of Mischief.
The idea is to leverage his AOE attacks to get as many attempts at landing a [Provoke] from the Provoke set on the Head of Decay as possible. Usually if you pair a Champion like this with another Champion that also provokes, you'll be fine throughout the fight as long as you meet the stat requirements of whatever level it is you're fighting.
Strategy Description
Artifacts Description
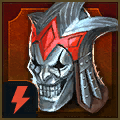
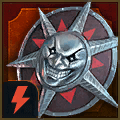
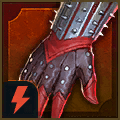
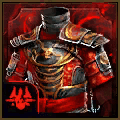
The Provoke set here is what we're looking for and having a good set of this is not an easy feat for some early to mid level accounts. We're looking for good SPD and ACC stats on the sub-stat rolls. As well as HP, DEF and RES. I'm not worried so much about getting his ATK up or CRIT, either rating or damage but you can still get some damage out of him with his masteries if you want.
I like the Perception set myself for the last 2-piece set but if you feel his accuracy is high enough for you there are plenty of other sets that also make sense, like Stoneskin for example. Just to get a little bit extra HP and RES.
The thought here is that he has two AOEs and one of them has the Block Buffs debuff after a Buff Removal. So that best case scenario, he can strip the buffs, then apply the provoke or land provokes from his A1 from counterattacks. Either through masteries or accessories. Which is why we chose Revenge for the accessory.
* Some artifact sets have upgraded versions available. If you have a better upgraded version of this recommended artifact set, definitely use that instead.
The masteries are pretty straight forward for a clan boss setup. I went down the Offense and Defense trees. I went with Warmaster at the end for some extra damage. On the defensive side there are plenty of counterattack opportunities to increase the frequency of landing Provoke.
First thing we started with is extra crit rate and extra crit damage. With extra damage when his HP is lower than 50% so Lifedrinker can produce bigger heal returns. There are more damage increases all the way down to Warmaster. They may be minimal but everything helps when you have a damage dealer champion swallowed by a head.
One the defensive side Ukko is getting a lot more damage mitigation capabilities. As well as the counterattacks. If you wanted to, you have the option of going with Fearsome Presence over Warmaster to increase your odds of landing a Provoke by an additional 5%. That would be good as well.
You could go the Support Tree if you needed more accuracy. Then go for Lasting Gifts and Master Hexer instead. There would be nothing wrong with that but optimally I like this setup just a little bit better. Especially if you have good gear.


![Shield Breaker: Increases damage inflicted to targets under [Shield] buffs by 25% Shield Breaker mastery icon.](/images/raid-shadow-legends/masteries/shield-breaker.png)


![Opportunist: Increases damage inflicted to targets with [Stun], [Sleep], [Fear], [True Fear], [Freeze], [Petrification] debuffs by 12%. Opportunist mastery icon.](/images/raid-shadow-legends/masteries/opportunist.png)


![Blood Shield: Places a [Shield] buff on this Champion for 1 turn when this Champion kills an enemy (except Boss' minions). The value of the [Shield] is equal to 15% of this Champion's MAX HP. Occurs once per turn Blood Shield mastery icon.](/images/raid-shadow-legends/masteries/blood-shield.png)


![Rejuvenation: Increases the amount of healing and the value of [Shield] buffs this Champion receives by 5% Rejuvenation mastery icon.](/images/raid-shadow-legends/masteries/rejuvenation.png)
![Mighty Endurance: Decreases the damage received by 10% if this Champion has [Stun], [Sleep], [Fear], [True Fear], [Freeze], [Petrification] debuffs. Mighty Endurance mastery icon.](/images/raid-shadow-legends/masteries/mighty-endurance.png)


![Wisdom of Battle: Has a 30% chance of placing a [Block Debuffs] buff on this Champion for 1 turn when [Stun], [Sleep], [Fear], [True Fear], [Freeze], [Petrification] debuffs expire on this Champion. Wisdom of Battle mastery icon.](/images/raid-shadow-legends/masteries/wisdom-of-battle.png)


![Harvest Despair: Has a 60% chance of placing a [Leech] debuff for 1 turn when placing [Stun], [Sleep], [Fear], [True Fear], [Freeze], [Petrification] debuffs. Harvest Despair mastery icon.](/images/raid-shadow-legends/masteries/harvest-despair.png)


![Deterrence: Has a 20% chance to counterattack an enemy when they apply a [Stun], [Sleep], [Fear], [True Fear], [Freeze], [Petrification], or [Sheep] debuff on an ally. Cooldown: 1 turn Deterrence mastery icon.](/images/raid-shadow-legends/masteries/deterrence.png)


![Fearsome Presence: Increases the chances of placing a [Stun], [Sleep], [Freeze], [Fear], [True Fear], [Provoke], or [Sheep] debuff from Skills or Artifacts by 5% Fearsome Presence mastery icon.](/images/raid-shadow-legends/masteries/fearsome-presence.png)


![Shieldbearer: Increases the value of [Shield] buffs this Champion casts by 5% Shieldbearer mastery icon.](/images/raid-shadow-legends/masteries/shieldbearer.png)


![Healing Savior: Increases the amount of healing and the value of [Shield] buffs placed by this Champion by 10% if the target ally has 40% HP or less Healing Savior mastery icon.](/images/raid-shadow-legends/masteries/healing-savior.png)


![Merciful Aid: Increases the amount of healing and the value of [Shield] buffs placed by this Champion by 15% if the target ally has [Stun], [Sleep], [Fear], [True Fear], or [Freeze], debuffs Merciful Aid mastery icon.](/images/raid-shadow-legends/masteries/merciful-aid.png)


![Lasting Gifts: Has a 30% chance to extend the duration of any buff cast by this Champion by 1 turn. It will not extend [Block Damage], [Unkillable], [Revive on Death], or [Taunt] buffs. Lasting Gifts mastery icon.](/images/raid-shadow-legends/masteries/lasting-gifts.png)

![Sniper: Increases the chances of placing any buff from Skills or Artifacts by 5%. It will not increase the chances of placing [Stun], [Sleep], [Freeze], [Fear], [True Fear], [Provoke], or [Petrification] debuffs. Sniper mastery icon.](/images/raid-shadow-legends/masteries/sniper.png)
![Master Hexer: Has a 30% chance to extend the duration of any buff cast by this Champion by 1 turn. It will not extend [Stun], [Sleep], [Freeze], [Provoke], [Fear], [True Fear], [Bomb], or [Petrification] debuffs. Master Hexer mastery icon.](/images/raid-shadow-legends/masteries/master-hexer.png)


Cruelty

Brimstone
Level 1 Blessing
There are actually many decent options here for Ukko. Brimstone could be ok with AOEs although the chance is low. Cruelty could also be good, especially when stacked up with others. I like Cruelty to keep maintaining the Hydra heads a lower defense.
Level 6 Blessing
There are a lot of options here for the high level blessing. The Brimstone blessing is interesting in the Hydra fight because not many abilities will trigger it but it can contribute some extra damage on the right heads at the right time. One of the heads that will trigger the effect is the Head of Decay so since Ukko is a direct counter to him, that makes sense. I like it at a higher blessing level due to the percentages and guaranteed aspect of it. Even if it's from another Champion brought on the team altogether.
