Nuke-Back Sniktraak
Nuke-Back Sniktraak Champion Loadout
I call this build nuke-back Sniktraak for obvious reasons. I like to use Sniktraak as a go-2nd champion in the arena due to his crazy reflect damage passive ability. It wouldn't make any sense not to take advantage of it. So in order to do so, I build Sniktraak like a nuker, so he can take as much damage as possible, having damage dealers eliminate themselves. Then, if Sniktraak is still alive, he can nuke back the enemy team or be resurrected by a reviver to do the nuking. Either way, Sniktraak is meant to obliterate the opposing team.
Since he is being hit first, he is already causing damage to the enemy team before he ever gets a turn. Then when he does get a turn, he can deal back a hefty amount of damage in return. I like to use him against weaker ATK based nukers that can't take a great deal of damage. Glass cannons if you will. This pairs well with his A1 Decrease Attack debuff.
Just beware of Polymorph and sheep. Not too many go-1st teams have it but some other teams will. I typically only use Sniktraak against go-1st type teams such as Arbiter teams. In that case, it's usually not a problem.
Strategy Description
Artifacts Description
It's NUKE-back Sniktraak for a reason so build him like a nuker with tons of HP. I like to run him in a Savage/Lethal 4-piece set with a Critical Damage 2-piece but anything works. This way he is still taking maximum damage and dishing back maximum damage.
I like to give him some accuracy, some speed and a bunch of critical damage with loads of health. The more defense you can squeeze in, the better. That'll give him more chance of surviving the hits and not needing a revive but remember the goal here is for him to take damage so he can reflect it back.
* Some artifact sets have upgraded versions available. If you have a better upgraded version of this recommended artifact set, definitely use that instead.
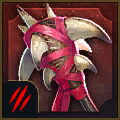
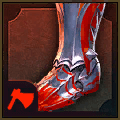
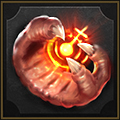
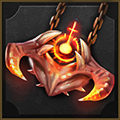
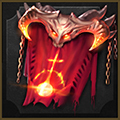
* There is an upgraded version of the Savage set called Lethal that can be crafted from materials gained from the Doom Tower when fighting the Dark Fae boss.
I went down the offense tree to Helmsmasher for the extra nuke damage. I went with Shieldbreaker because you never know who will have a shield on the other team. That allows us to get Ruthless Ambush for a bigger A2 nuke and Cycle of Violence to help refresh it.
On the support side I went with Steadfast for the extra HP and Shieldbearer for the extra shields from the A2. Swarm Smiter for the extra accuracy helps a bit to land the debuffs. I always hate Evil Eye in the arena when the other team uses it so it's always a nice addition to my team. Then I grabbed Master Hexer last.
We could have went with the extra shield buffs and Lasting Gifts but I'm not the biggest fan of the shields, with how they interact with the reflect damage mechanic so I went the other way with it.


![Shield Breaker: Increases damage inflicted to targets under [Shield] buffs by 25% Shield Breaker mastery icon.](/images/raid-shadow-legends/masteries/shield-breaker.png)


![Opportunist: Increases damage inflicted to targets with [Stun], [Sleep], [Fear], [True Fear], [Freeze], [Petrification] debuffs by 12%. Opportunist mastery icon.](/images/raid-shadow-legends/masteries/opportunist.png)


![Blood Shield: Places a [Shield] buff on this Champion for 1 turn when this Champion kills an enemy (except Boss' minions). The value of the [Shield] is equal to 15% of this Champion's MAX HP. Occurs once per turn Blood Shield mastery icon.](/images/raid-shadow-legends/masteries/blood-shield.png)


![Rejuvenation: Increases the amount of healing and the value of [Shield] buffs this Champion receives by 5% Rejuvenation mastery icon.](/images/raid-shadow-legends/masteries/rejuvenation.png)
![Mighty Endurance: Decreases the damage received by 10% if this Champion has [Stun], [Sleep], [Fear], [True Fear], [Freeze], [Petrification] debuffs. Mighty Endurance mastery icon.](/images/raid-shadow-legends/masteries/mighty-endurance.png)


![Wisdom of Battle: Has a 30% chance of placing a [Block Debuffs] buff on this Champion for 1 turn when [Stun], [Sleep], [Fear], [True Fear], [Freeze], [Petrification] debuffs expire on this Champion. Wisdom of Battle mastery icon.](/images/raid-shadow-legends/masteries/wisdom-of-battle.png)


![Harvest Despair: Has a 60% chance of placing a [Leech] debuff for 1 turn when placing [Stun], [Sleep], [Fear], [True Fear], [Freeze], [Petrification] debuffs. Harvest Despair mastery icon.](/images/raid-shadow-legends/masteries/harvest-despair.png)


![Deterrence: Has a 20% chance to counterattack an enemy when they apply a [Stun], [Sleep], [Fear], [True Fear], [Freeze], [Petrification], or [Sheep] debuff on an ally. Cooldown: 1 turn Deterrence mastery icon.](/images/raid-shadow-legends/masteries/deterrence.png)


![Fearsome Presence: Increases the chances of placing a [Stun], [Sleep], [Freeze], [Fear], [True Fear], [Provoke], or [Sheep] debuff from Skills or Artifacts by 5% Fearsome Presence mastery icon.](/images/raid-shadow-legends/masteries/fearsome-presence.png)


![Shieldbearer: Increases the value of [Shield] buffs this Champion casts by 5% Shieldbearer mastery icon.](/images/raid-shadow-legends/masteries/shieldbearer.png)


![Healing Savior: Increases the amount of healing and the value of [Shield] buffs placed by this Champion by 10% if the target ally has 40% HP or less Healing Savior mastery icon.](/images/raid-shadow-legends/masteries/healing-savior.png)


![Merciful Aid: Increases the amount of healing and the value of [Shield] buffs placed by this Champion by 15% if the target ally has [Stun], [Sleep], [Fear], [True Fear], or [Freeze], debuffs Merciful Aid mastery icon.](/images/raid-shadow-legends/masteries/merciful-aid.png)


![Lasting Gifts: Has a 30% chance to extend the duration of any buff cast by this Champion by 1 turn. It will not extend [Block Damage], [Unkillable], [Revive on Death], or [Taunt] buffs. Lasting Gifts mastery icon.](/images/raid-shadow-legends/masteries/lasting-gifts.png)

![Sniper: Increases the chances of placing any buff from Skills or Artifacts by 5%. It will not increase the chances of placing [Stun], [Sleep], [Freeze], [Fear], [True Fear], [Provoke], or [Petrification] debuffs. Sniper mastery icon.](/images/raid-shadow-legends/masteries/sniper.png)
![Master Hexer: Has a 30% chance to extend the duration of any buff cast by this Champion by 1 turn. It will not extend [Stun], [Sleep], [Freeze], [Provoke], [Fear], [True Fear], [Bomb], or [Petrification] debuffs. Master Hexer mastery icon.](/images/raid-shadow-legends/masteries/master-hexer.png)


Life Harvest

Life Harvest
Level 1 Blessing
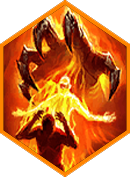
Life Harvest is a fun blessing. Imagine you nuke Sniktraak, only to die, then be revived again with even less hp than you started with before you nuked him. It absolutely ruins attackers health pools in the odd chance that you end up in a sustained prolonged fight. Eventually the nukers are revived with so little health that they can no longer stay alive, while you finish off the much tankier reviver.
That's exactly what this does and it is fun to behold. It keeps nukers nuked and on ice the whole fight. The higher the blessing, the better. It also has good stats that compliment Sniktraak well.
Level 6 Blessing
The Life Harvest blessing is even better at the higher levels. The first level is not so great but anything after that is pretty nice. At the highest level it's just devastating to any go-1st nukers that happen to die and get revived. They just won't be able to sustain themselves any longer. Beware the trap that is Sniktraak in the arena. Definitely come at him with a very sound plan otherwise you will be punished.
