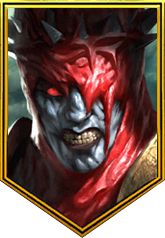
Bloodmoon Shaman
Bloodmoon Shaman Champion Loadout
King Gallcobar looked like a great addition to a Hydra team or to go against the Hard Dragon when he was first released but after this new encounter came out in Sintranos, he actually seemed perfect for the team as the buff remover for the Amius fight. Not only does his A2 remove buffs from enemies but it will also transfer all the removed buffs into 5% poison debuffs. Which is a great source of damage in this fight.
The rest of his kit seems to synergize very well with this encounter, too. He will make it seem like your team is pretty comfy as they slay this boss. I prefer the relaxed fights more than the chaotic ones personally speaking. His shields can help mitigate damage quite a bit and his A3 cleanse can offer some healing as well. He is all around a great champion for this encounter.
Strategy Description
What you will want to do when you're fighting Amius is go with your A1 first if you're faster than the boss. Have another champion on your team debuff the boss so that the boss will use his A3 to flip the debuffs into buffs. Then have Gallcobar use his A2, with enough accuracy, to remove those buffs and the fight is already going to go very smoothly for you during the first phase.
After Amius transitions into his next phase and does his A3 into his A2 ability, that is when you can use Gallcobar's A3 ability to cleanse your team of the debuffs they now have and change those to Continuous Heals to help possibly heal up a bit before the big single target A1 attack that is coming next. Depending on your speed tune. I like pairing King Gallcobar with his friend from the Sylvan Watchers faction, Greenwarden Ruarc. Together they tank Amius hits like it's nothing.
Artifacts Description
I like the Protection set for King Gallcobar here. Especially if you can get the 9-piece bonus here. Normally you'll want to consider if it is alright to use the Protection set because it seems as if Amius will not flip buffs that are protected so you wouldn't want to protect every buff in the fight but King Gallcobar has so many Shields and Continuous Heal buffs that they make great candidates for being protected. He can also put out quite a bit of buffs so if you have that 9-piece damage bonus going even better.
This fight is mostly about the stats. More than sets. I say that a lot. Get your speed above 250 if you can. Your accuracy above 450 if you can and as much health as you can get. If you have a blessing on your champion, mix in more defense if possible. Just avoid the Refresh accessories. The Protection ones work great. The Supersonic set is nice. Revenge accessories are also good if you have them or even the Cleansing accessories.
* Some artifact sets have upgraded versions available. If you have a better upgraded version of this recommended artifact set, definitely use that instead.
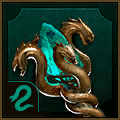
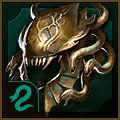

I have a unique set of masteries on this champion due to his unique kit. I wanted to get to Eagle Eye but I also wanted to get Lasting Gifts.


![Shield Breaker: Increases damage inflicted to targets under [Shield] buffs by 25% Shield Breaker mastery icon.](/images/raid-shadow-legends/masteries/shield-breaker.png)


![Opportunist: Increases damage inflicted to targets with [Stun], [Sleep], [Fear], [True Fear], [Freeze], [Petrification] debuffs by 12%. Opportunist mastery icon.](/images/raid-shadow-legends/masteries/opportunist.png)


![Blood Shield: Places a [Shield] buff on this Champion for 1 turn when this Champion kills an enemy (except Boss' minions). The value of the [Shield] is equal to 15% of this Champion's MAX HP. Occurs once per turn Blood Shield mastery icon.](/images/raid-shadow-legends/masteries/blood-shield.png)


![Rejuvenation: Increases the amount of healing and the value of [Shield] buffs this Champion receives by 5% Rejuvenation mastery icon.](/images/raid-shadow-legends/masteries/rejuvenation.png)
![Mighty Endurance: Decreases the damage received by 10% if this Champion has [Stun], [Sleep], [Fear], [True Fear], [Freeze], [Petrification] debuffs. Mighty Endurance mastery icon.](/images/raid-shadow-legends/masteries/mighty-endurance.png)


![Wisdom of Battle: Has a 30% chance of placing a [Block Debuffs] buff on this Champion for 1 turn when [Stun], [Sleep], [Fear], [True Fear], [Freeze], [Petrification] debuffs expire on this Champion. Wisdom of Battle mastery icon.](/images/raid-shadow-legends/masteries/wisdom-of-battle.png)


![Harvest Despair: Has a 60% chance of placing a [Leech] debuff for 1 turn when placing [Stun], [Sleep], [Fear], [True Fear], [Freeze], [Petrification] debuffs. Harvest Despair mastery icon.](/images/raid-shadow-legends/masteries/harvest-despair.png)


![Deterrence: Has a 20% chance to counterattack an enemy when they apply a [Stun], [Sleep], [Fear], [True Fear], [Freeze], [Petrification], or [Sheep] debuff on an ally. Cooldown: 1 turn Deterrence mastery icon.](/images/raid-shadow-legends/masteries/deterrence.png)


![Fearsome Presence: Increases the chances of placing a [Stun], [Sleep], [Freeze], [Fear], [True Fear], [Provoke], or [Sheep] debuff from Skills or Artifacts by 5% Fearsome Presence mastery icon.](/images/raid-shadow-legends/masteries/fearsome-presence.png)


![Shieldbearer: Increases the value of [Shield] buffs this Champion casts by 5% Shieldbearer mastery icon.](/images/raid-shadow-legends/masteries/shieldbearer.png)


![Healing Savior: Increases the amount of healing and the value of [Shield] buffs placed by this Champion by 10% if the target ally has 40% HP or less Healing Savior mastery icon.](/images/raid-shadow-legends/masteries/healing-savior.png)


![Merciful Aid: Increases the amount of healing and the value of [Shield] buffs placed by this Champion by 15% if the target ally has [Stun], [Sleep], [Fear], [True Fear], or [Freeze], debuffs Merciful Aid mastery icon.](/images/raid-shadow-legends/masteries/merciful-aid.png)


![Lasting Gifts: Has a 30% chance to extend the duration of any buff cast by this Champion by 1 turn. It will not extend [Block Damage], [Unkillable], [Revive on Death], or [Taunt] buffs. Lasting Gifts mastery icon.](/images/raid-shadow-legends/masteries/lasting-gifts.png)

![Sniper: Increases the chances of placing any buff from Skills or Artifacts by 5%. It will not increase the chances of placing [Stun], [Sleep], [Freeze], [Fear], [True Fear], [Provoke], or [Petrification] debuffs. Sniper mastery icon.](/images/raid-shadow-legends/masteries/sniper.png)
![Master Hexer: Has a 30% chance to extend the duration of any buff cast by this Champion by 1 turn. It will not extend [Stun], [Sleep], [Freeze], [Provoke], [Fear], [True Fear], [Bomb], or [Petrification] debuffs. Master Hexer mastery icon.](/images/raid-shadow-legends/masteries/master-hexer.png)



Brimstone

Brimstone
Level 1 Blessing
Like all champions for this fight that are built with accuracy (I usually have 2-3 this way) Brimstone will make a great addition to any team here. Even at the low levels it contributes something to the damage. Emergency Heal is a decent alternative if you're worried about staying alive.
Level 6 Blessing
Higher level Brimstone blessing is where it is at. You like to land it consistently. Nothing wrong with making him your Brimstone champion. In fact he probably needs the survivability less than anyone in this fight. Being HP based.
