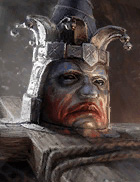
Rampant Madcapper
Rampant Madcapper Champion Loadout
When I first saw Timit the Fool, I thought he'd naturally be a great anti-sheep buff remover in the arena. Little did I know, he'd be a perfect against Amius the Lunar Archon in this fight when it would come out and Banner Lords would join the rotation. Timit is such a great asset in being able to remove the buffs that Amius gives himself when he flips the debuffs with his A3 in his first form.
In fact, his whole kit really synergizes well with this encounter. His A3 Increase Accuracy buff can act as a buff that is flippable to bait Amius into using his A3 in his alternative form. His A1 can also heal him up a bit, which definitely helps to keep him alive during the fight and doesn't make him so reliant on outside healing to survive.
If built fast enough during the fight you can have Timit use his A1 on the first turn while other champions debuff the boss to cause him to use his A3 as his first turn. This will cause him to flip the debuffs into buffs. Timit's next turn should be using his A2 to remove those buffs so Amius doesn't destroy your team or at least, the weakest links on it. Then when Amius has one more turn left before switching forms you can use Timit's A3 to give the team Increase Accuracy. If a cleanser is available, have them cleanse the Decrease Accuracy after Amius flips it on the next turn. Rinse, repeat that order of attacks to win this fight.
Timit makes this boss and this fight overall very trivial in combination with some other champions. He doesn't even need to be built to do any damage. He just needs to have the accuracy to make sure he gets his A2 to work consistently. Which was easy for me to do personally speaking. Being an HP champion by default he naturally survives very well.
Strategy Description
Artifacts Description
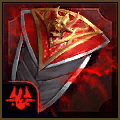
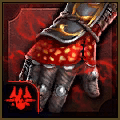
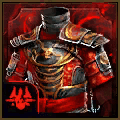
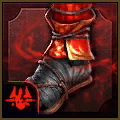
I like the Perception set here because I want to get that accuracy up to be able to land the A2 every time Timit does it and we need it. If you can get the accuracy required and build something like a Savage set, that would be nice, too. Then you could dual-use Timit in the arena as well. Perception works really well at least as a two-piece even if you go Savage/Lethal. I didn't even need Eagle Eye when I built him but if you do, go for it.
Mostly the stats are what matter in this fight. With Timit you want to prioritize enough speed, accuracy and health to survive. After that anything else is great.
* Some artifact sets have upgraded versions available. If you have a better upgraded version of this recommended artifact set, definitely use that instead.


I like Eagle Eye and Unshakeable as sixth tier masteries. You could go offense if you build him tanky enough and get enough accuracy. Warmaster would work here, too, with the right stats or even Helmsmasher if you want to use him in the arena, too. If you can skip Eagle Eye, none of the fifth tier masteries for the support tree really help Timit out. I do like Pinpoint Accuracy, Charged Focus and Swarm Smiter if you need them though.
I really have settled into kind of a pocket for the Amius fight mastery-wise. I really like the combo of Defiant, Improved Parry and Rejuvenation. You get some damage mitigation, resistance and more healing/shields. There's a lot to like there. Then Shadow Heal and Resurgent. For any champion providing buffs, Solidarity is good for this fight. The more resistance, the better is how I see it. Delay Death is fantastic and I like the two counterattack abilities here, Retribution and Deterrence. At this point it's Unshakeable or Eagle Eye if you're in the Defense and Support tree. If you lack accuracy, grab Eagle Eye, if not, go with Unshakeable.
As always stay away from Cycle of Magic unless you like chaos.


![Shield Breaker: Increases damage inflicted to targets under [Shield] buffs by 25% Shield Breaker mastery icon.](/images/raid-shadow-legends/masteries/shield-breaker.png)


![Opportunist: Increases damage inflicted to targets with [Stun], [Sleep], [Fear], [True Fear], [Freeze], [Petrification] debuffs by 12%. Opportunist mastery icon.](/images/raid-shadow-legends/masteries/opportunist.png)


![Blood Shield: Places a [Shield] buff on this Champion for 1 turn when this Champion kills an enemy (except Boss' minions). The value of the [Shield] is equal to 15% of this Champion's MAX HP. Occurs once per turn Blood Shield mastery icon.](/images/raid-shadow-legends/masteries/blood-shield.png)


![Rejuvenation: Increases the amount of healing and the value of [Shield] buffs this Champion receives by 5% Rejuvenation mastery icon.](/images/raid-shadow-legends/masteries/rejuvenation.png)
![Mighty Endurance: Decreases the damage received by 10% if this Champion has [Stun], [Sleep], [Fear], [True Fear], [Freeze], [Petrification] debuffs. Mighty Endurance mastery icon.](/images/raid-shadow-legends/masteries/mighty-endurance.png)


![Wisdom of Battle: Has a 30% chance of placing a [Block Debuffs] buff on this Champion for 1 turn when [Stun], [Sleep], [Fear], [True Fear], [Freeze], [Petrification] debuffs expire on this Champion. Wisdom of Battle mastery icon.](/images/raid-shadow-legends/masteries/wisdom-of-battle.png)


![Harvest Despair: Has a 60% chance of placing a [Leech] debuff for 1 turn when placing [Stun], [Sleep], [Fear], [True Fear], [Freeze], [Petrification] debuffs. Harvest Despair mastery icon.](/images/raid-shadow-legends/masteries/harvest-despair.png)


![Deterrence: Has a 20% chance to counterattack an enemy when they apply a [Stun], [Sleep], [Fear], [True Fear], [Freeze], [Petrification], or [Sheep] debuff on an ally. Cooldown: 1 turn Deterrence mastery icon.](/images/raid-shadow-legends/masteries/deterrence.png)


![Fearsome Presence: Increases the chances of placing a [Stun], [Sleep], [Freeze], [Fear], [True Fear], [Provoke], or [Sheep] debuff from Skills or Artifacts by 5% Fearsome Presence mastery icon.](/images/raid-shadow-legends/masteries/fearsome-presence.png)


![Shieldbearer: Increases the value of [Shield] buffs this Champion casts by 5% Shieldbearer mastery icon.](/images/raid-shadow-legends/masteries/shieldbearer.png)


![Healing Savior: Increases the amount of healing and the value of [Shield] buffs placed by this Champion by 10% if the target ally has 40% HP or less Healing Savior mastery icon.](/images/raid-shadow-legends/masteries/healing-savior.png)


![Merciful Aid: Increases the amount of healing and the value of [Shield] buffs placed by this Champion by 15% if the target ally has [Stun], [Sleep], [Fear], [True Fear], or [Freeze], debuffs Merciful Aid mastery icon.](/images/raid-shadow-legends/masteries/merciful-aid.png)


![Lasting Gifts: Has a 30% chance to extend the duration of any buff cast by this Champion by 1 turn. It will not extend [Block Damage], [Unkillable], [Revive on Death], or [Taunt] buffs. Lasting Gifts mastery icon.](/images/raid-shadow-legends/masteries/lasting-gifts.png)

![Sniper: Increases the chances of placing any buff from Skills or Artifacts by 5%. It will not increase the chances of placing [Stun], [Sleep], [Freeze], [Fear], [True Fear], [Provoke], or [Petrification] debuffs. Sniper mastery icon.](/images/raid-shadow-legends/masteries/sniper.png)
![Master Hexer: Has a 30% chance to extend the duration of any buff cast by this Champion by 1 turn. It will not extend [Stun], [Sleep], [Freeze], [Provoke], [Fear], [True Fear], [Bomb], or [Petrification] debuffs. Master Hexer mastery icon.](/images/raid-shadow-legends/masteries/master-hexer.png)



Brimstone

Brimstone
Level 1 Blessing
Brimstone is a great blessing for this fight and at least one or two champions should have high accuracy in this fight. Timit being one of them if you bring him to the fight. Naturally any champion with high accuracy would be a great candidate for Brimstone here. Level one Brimstone doesn't land often but it definitely helps out when it does.
Level 6 Blessing
A higher Brimstone blessing will help land the Brimstone more often and should help keep Timit alive easier in the fight. You should be able to keep him alive without a high blessing easily regardless so you will want it more for the damage than anything else. If you already have someone else for this fight with Brimstone, you could go with Crushing Rend or something like that to increase your damage even more. Pure raw damage also is a very viable form of strategy to win this fight.

